
 It’s been wonderful being in the new house. We love Mount Pleasant, and are really glad with the move to South Carolina. As with any move, however, there are some things that we didn’t love about the new house:
- The hideously filthy carpet on the second floor (it was terrible).
- The cabinets in the kitchen
- The cabinets in the bathrooms
- The appliances
- Paint colors on the second floor
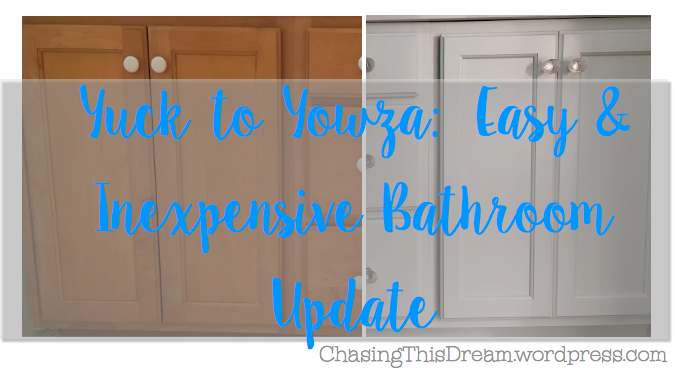
We prioritized where our renovation budget was going to be spent. Highest on the priority list was the carpet on the second floor. I have pretty severe allergies, so having carpet in a large portion of the house isn’t really an option. After painting (some of the colors were rough, and it’s a pretty easy fix), and setting aside money to update the kitchen (more on that later), changing out the cabinets in both upstairs bathrooms wasn’t in the budget. While there wasn’t money to replace the honey-esque wooden cabinets, they were in great shape and painting them seemed like a good option.
 After doing little (seriously, we hardly looked into it) research, we chose
 Valspar cabinet enamel. I really liked it in the store because it’s tintable (our color is Oxford White, which is what the house trim will be…eventually), and it claims to not have brushstrokes (spoiler: it’s true!). It was economical too…FAR less than replacing cabinetry, countertops, and sinks!
To start with, I cleaned the cabinets and frames twice (with warm soapy water) and then wiped them down with just water. After cleaning them, I removed the drawers and cabinet fronts from the bathroom, removed the hardware, and then sanded them- 
I wanted to make a hospitable environment for the paint to adhere to. When painting, I started by painting the detail portions (see photo) and edges with a brush and then going over all of it with a small, low-nap roller. This method worked really well.


Over the course of two days, I put three coats on. I let them dry thoroughly between coats. This is definitely the type of project that you want to take your time. I’m hoping that by allowing the individual coats to dry, the finish will be much more durable (and to date, it has). I followed the same steps for painting the frame/structure of the bathroom cabinets- the part still in the bathroom. I painted the drawer and cabinet fronts in a bedroom on the (hideous) carpet, which had still to be removed, so it wasn’t necessary to protect the carpet from paint.

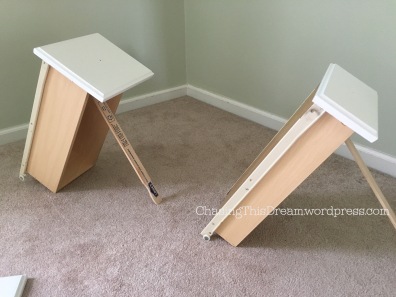
I used some of the wooden paint stir sticks to hold up the drawers, so that they wouldn’t be on the carpet to keep fibers and assorted grime off of the newly painted drawers. This method worked so well- I would definitely use those again.
Once I was certain the newly painted items were dry: not just dry to the touch, not just tacky- you want these to be desert dry…it will help prevent nicks and scrapes when you’re reinstalling them. We had a little money still in the budget for new hardware. Blissfully, Anthropologie was having a sale and we found these wonderful pulls, which really pulled the whole look together.


I was very impressed with the quality of the Valspar cabinet enamel- it was thick, covered well, and I was surprised that one can of paint was able to do both of the bathrooms (and honestly still have some left over). I painted these in March and now it’s almost June- the cabinets still look great, and are still in awesome shape. I’ve banged the doors, run the vacuum into them, and they’re still looking fantastic. I’m so pleased with how inexpensive this update was and what a huge impact it has had on our bathrooms- they look so much better.
Do you have a project you need to tackle at your house? Maybe some cabinets to paint? Like the Chasing This Dream Facebook page for a chance to win $15 at Lowe’s to get your project started. The winner will be chosen on Monday June 6th (giveaway sponsored by Valspar, opinions sponsored by me).


Wow! It’s amazing how a little paint can transform a space!
LikeLike